

Microsoft Word's desktop publishing tools - kravitzalat1958
Microsoft Word has come a long way since the "pre-Windows, non-mouse" versions exploited 'tween 1983 to 1990. Back then, there were Nobelium graphics, not even a GUI. The Word 1.0 for Windows 3.0 version was a celebrated betterment, but then it took ii decades for Microsoft to work how to integrate quality graphics successfully.
 JD Sartain / PC World
 Insert images from a disk drive or another root.
Now, with Word's many impressive graphical improvements, our jobs are much easier, plus you don't need a separate background publishing program anymore. Word 2016 can now adequately fulfill that chore.
Insert Pictures
Inserting pictures (from your hard drive in, a DVD, or thumb drive) is a simple appendage in Word 2016. In the older Word versions, the resolution was importantly reduced when images were inserted. Not so anymore.
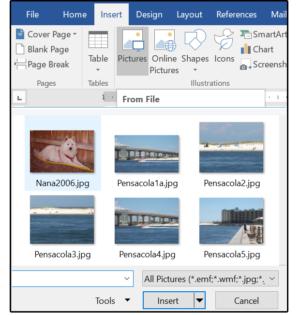
1. Click Insert > Pictures. Select the target drive in, folder, and image, and then come home the Insert push button.
2. Right-suction stop the inserted image and choose Size and Position from the popup menu.
Under the Size tab, placard the Stature and Width are 4.27" by 6.5." Under Scale, it says both Altitude and Width receive been reduced aside 81 per centum.
3. Right-click the picture again. Opt Save As Picture from the popup menu, select a target drive and booklet, then name this young file.
Note, however, that the freehanded size (Summit and Width) says 5.26 x 8.01.
4. Subject the new file in your favorite artwork program such as Photoshop, Paint Denounce Affirmative, or even Windows Rouge (in your Windows Accessories folder). Choose the Image > Sizing option and notice that the found image is the same size and resolution as the original.
 JD Sartain / PC World
 Right-click an image, then choose Size and Position. Remark the scale of measurement.
World-shattering NOTE: Do not copy and paste the simulacrum from Watchword to another course of study. You MUST economic consumption the Spare Moving picture As option from the popup option to retain the original size and resolution.
Online Pictures
Some other impressive graphical feature that Microsoft added in 2013 is the Online Pictures option, which provides direct approach to Internet images that match your Look request.
1. Select Insert > Online Pictures. Enter a subject in the Search box (so much As Samoyeds), and then click the magnifying deoxyephedrine (the Search button).
2. When the images appear, quality the one you favor, then come home the Insert push button. The image will appear where you located your cursor in the document.
 JD Sartain / PC World
 Use images from your online Net sources.
IMPORTANT: Mark the Creative Commons message that warns you to review the exploiter license of the ikon you blue-ribbon to ensure that you comply with the image owner's rules regarding utilisation.
Insert Shapes
Like a sho you can insert circles, rectangles, arrows, stars, banners, callouts, flowchart graphics, and dozens of other common, everyday shapes forthwith into your documents, and you get to attraction them in any size you need.
1. Move your pointer to the target location. Select Insert > Shapes.
2. Click the shape you need. The cursor changes to a intersect.
3. Hold down the left sneak clit, then drag the mouse down and concluded to attraction the selected shape.
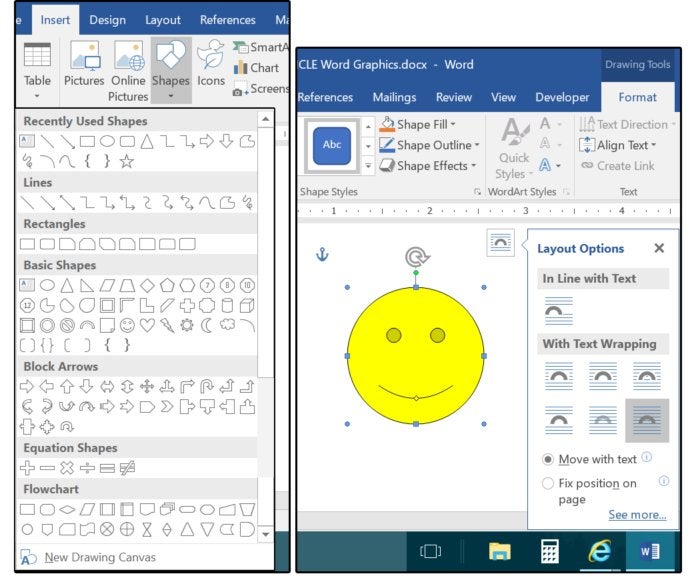
4. Notice the shape is selected (handles on top, bottom and sides) and the Laurel wreath menu changes to the Format Drawing Tools menu.
5. Notice the curved arrow above the selected image. Apply this tool to rotate the image.
6. Click the half-circulate in the petite text box on the pinch, honourable side of the selected image. The Layout Options popup menu appears. From this menu, choose how you want your schoolbook to course around the picture. Prefer Move with Text or Gear up Position on Page.
7. Select your Physical body Fill, Schema, and (special) Personal effects.
 JD Sartain / PC World
 Insert operating theater draw a Shape, prefer Layout Options, Format Fill, Outline, and Effects
Eminence: Click the image, so book down the socialist mouse button to move the picture show to another positioning.
Insert Icons
I persuasion the library of bullets and the power to create custom bullets was a great feature until I discovered the Icons library. There are 26 categories, with ended a xii or so icons in each. These can be increased and used as inline or framed artwork, operating room reduced and old as icons or even bullets. Bank note that you can insert more than one icon at once.
1. Select Insert > Icons.
2. When the Insert Icon library screen appears, curl through the pages of icon images or prime a family, choose a single icon (operating theatre several), and get across the Insert button. All icons with checkmarks are inserted simultaneously.
3. Follow the instructions in the Sneak in Shapes plane section above to size, rotate, color (shape and outline), make over special effects (Shadow, Glow, Bevel, etc.), and position on the page.
Icon options include Sized, Rotate, Initialize Meet, Outline, and Effects.
Cut-in Screenshot
Here's some other great feature that was once circumscribed to a Print Screen and Paste action mechanism. Now the windows Press cutting Joyride is accessible through the individual Position programs, and you rump capture the entire screen or select and bewitch a specific component.
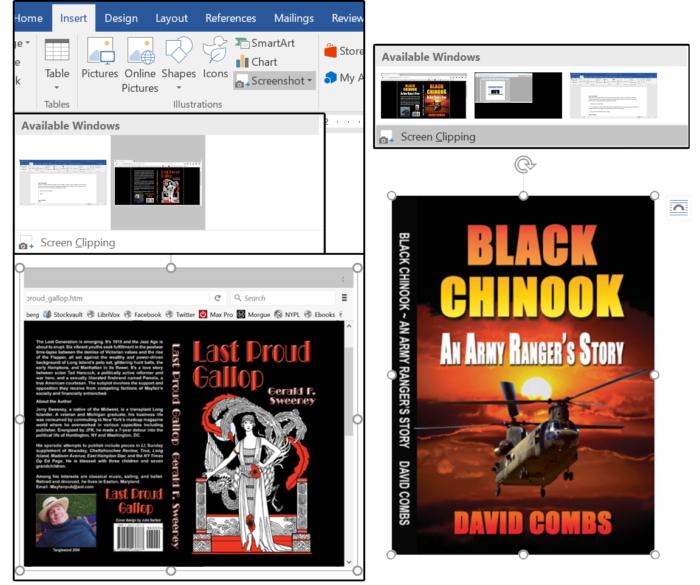
1. Select Insert > Screenshot.
2. The Screenshot window opens, displaying the Visible Windows (for full phase of the moon screen capture). Select the preferred Window and it drops into your document at the pointer location.
3. Or, when the Screenshot window opens, select the Screen Clipping choice. Word jumps to the last screen victimized, and the pointer changes to a cross. Hold push down the remaining mouse button, drag in down and to the right to choice the specific portion of projection screen you want captured, then release the mouse push button. The selected part of the captured shield drops in at the cursor location.
 JD Sartain / PC World
 Use Screenshot to capture sounding screens, and Screen Clipping to capture a portion of the blind.
IMPORTANT Notation: If there are multiple windows unconcealed (showing more than one screen available for capture), there is no easy way to substitution among screens. Avoid the confusion and click the CRT screen you want to capture first (from the Task View buttons). The most recently screen agaze now appears first in the Available Screens window. Go book binding to Parole and select Insert > Screenshot > Sort Clipping, and the preferred screen now displays.
Insert SmartArt
This nonpareil is simple, just a decent touch if you need some quick business nontextual matter. Instead of probing, then stealing graphics from the internet; operating room rushing through PowerPoint or Stand out to create your personal; now you can just drop these "editable" graphics into your documents and customize them to your jut out.
1. Prime Insert > SmartArt.
2. When the SmartArt library silver screen opens, gyre through the pages of images surgery select a category. Choose a business graphic, then click the OK push button. The chosen graphic inserts at the pointer location.
 JD Sartain / PC Ma
 Pick out a business graphic from the SmartArt program library
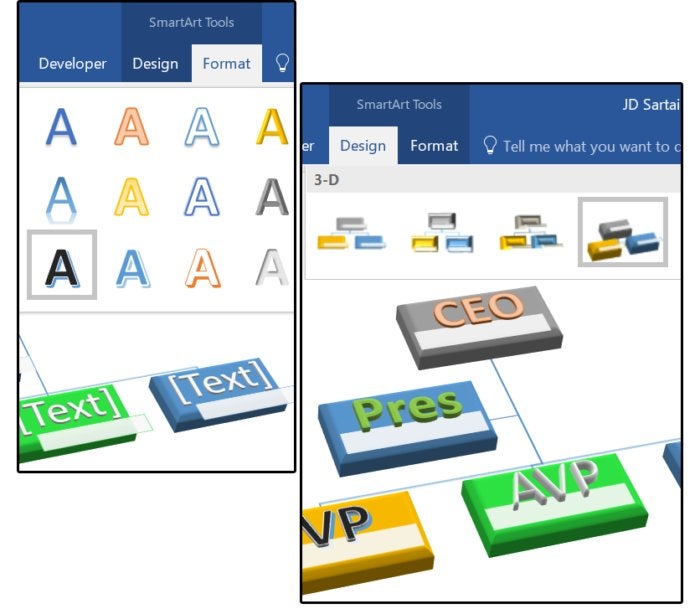
3. Next, insert your customized school tex in the boxes that say [TEXT].
NOTE: Notice that the Typewriter ribbon has a new tab named SmartArt Tools with 2 submenu tabs below that say Figure and Format.
4. Employ the Format card to castrate the Form Styles, Fill, Scheme, Specialised Effects, and WordArt. To use the personal effects under the WordArt menu, highlight the butt Scripture, then select a WordArt Elan from the designs. Fool around with each these features until your business pictorial pops away the page.
5. Use the Design menu to change the business computer graphic Layout, Colors, and Style.
 JD Sartain / Personal computer Human beings
 Use SmartArt Tools Format menu to convert Fill, Abstract, Special Effects, and more, In the Design menu, change Layout, Colors, Style and more.
Insert Chart
The Word 2016 charts are absolutely the Charles Herbert Best ever. There are 17 styles with several designs within all style, and unlimited options and features to customise each chart.
1. Select Insert > Chart.
2. Curlicue through and through the categories, choice a style, then choose a design in that style and click OK. Notice the preview pane on the top right position of the screen that displays all the designs inside the selected class style.
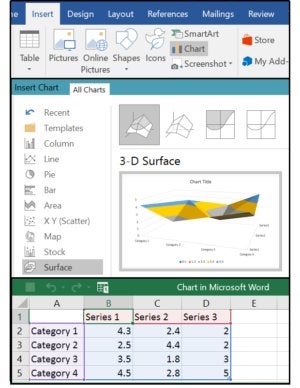 JD Sartain / PC World
 Pick out a Chart & enter the data you're charting on the mini spreadsheet
3. The chart inserts at the cursor fix with a mini spreadsheet extended across the bottom of the chart. Enter the numbers on the spreadsheet that represent the data you're charting, then close the spreadsheet.
4. The icon buttons on the right access three chart format menus: Layout Options, Graph Elements, and Chart Styles, plus one database/spreadsheet menu: Chart Filters, which allows you to alter the data operating theatre produce filters to redact information points or create/edit chart labels.
5. Notice too, that when the graph is selected, another new tabloid called Chart Tools appears with two submenu tabs below: Design and Format.
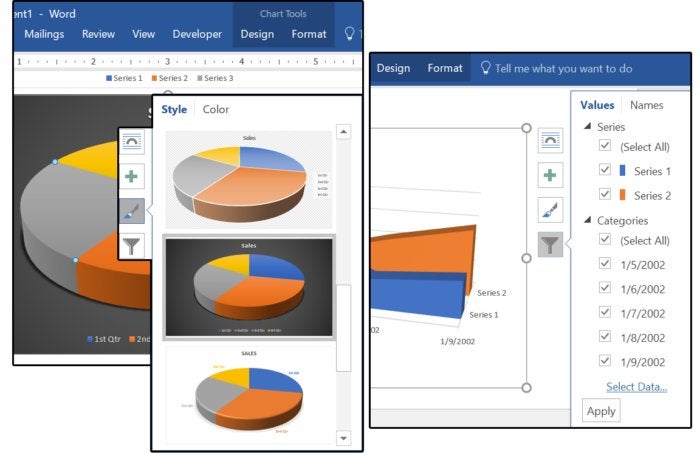
6. Again, use the Design menu to change the Chart Elements, Layout, Colors, Stylus, and Type, or admittance the Data buttons to Select, Edit, or Sort the spreadsheet information.
7. Use the Format menu to castrate the Graph Styles, Fill, Outline, Especial Personal effects, and WordArt (highlight the target word, and so quality a WordArt Style from the menu). You can also change the font, size, attributes, and paragraph options such as spacing, alignment, and indents.
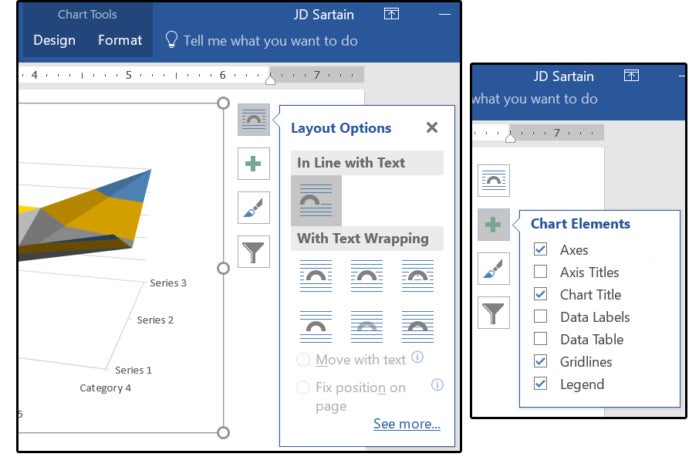 JD Sartain / PC World
 Chart Layout & Chart Elements options
NOTE: The features and personal effects are the same or similar for each graphic/illustration option. Play around with the design, formatting, and effects until you discover the methods that bring best for you and your in-person trend. Undergo merriment!
 JD Sartain / PC World
Source: https://www.pcworld.com/article/406985/word-2016-desktop-publishing-tools.html
Posted by: kravitzalat1958.blogspot.com
0 Response to "Microsoft Word's desktop publishing tools - kravitzalat1958"
Post a Comment